


CHASE BAYS
Chase Bays - Bias Valve Mounting & Routing for Brake Booster Eliminator (CB-U-BBECOMBO)
Chase Bays - Bias Valve Mounting & Routing for Brake Booster Eliminator (CB-U-BBECOMBO)
SKU:CB-U-BBECOMBO
Couldn't load pickup availability
Mon-Fri 10–5 EST | Sales & Support
Sat-Sun 10–5 EST | Sales
OVERVIEW
If you purchased or are purchasing our Brake Booster Eliminator and we don’t make a Brake Line Relocation / Adaption for your chassis, routing the brake lines can be difficult and overwhelming. THIS is the solution. THIS PRODUCT IS INCLUDED in all of our inBay BBE Brake Line Relocations, in addition to the perfect fit lines and adapter for the respective chassis.
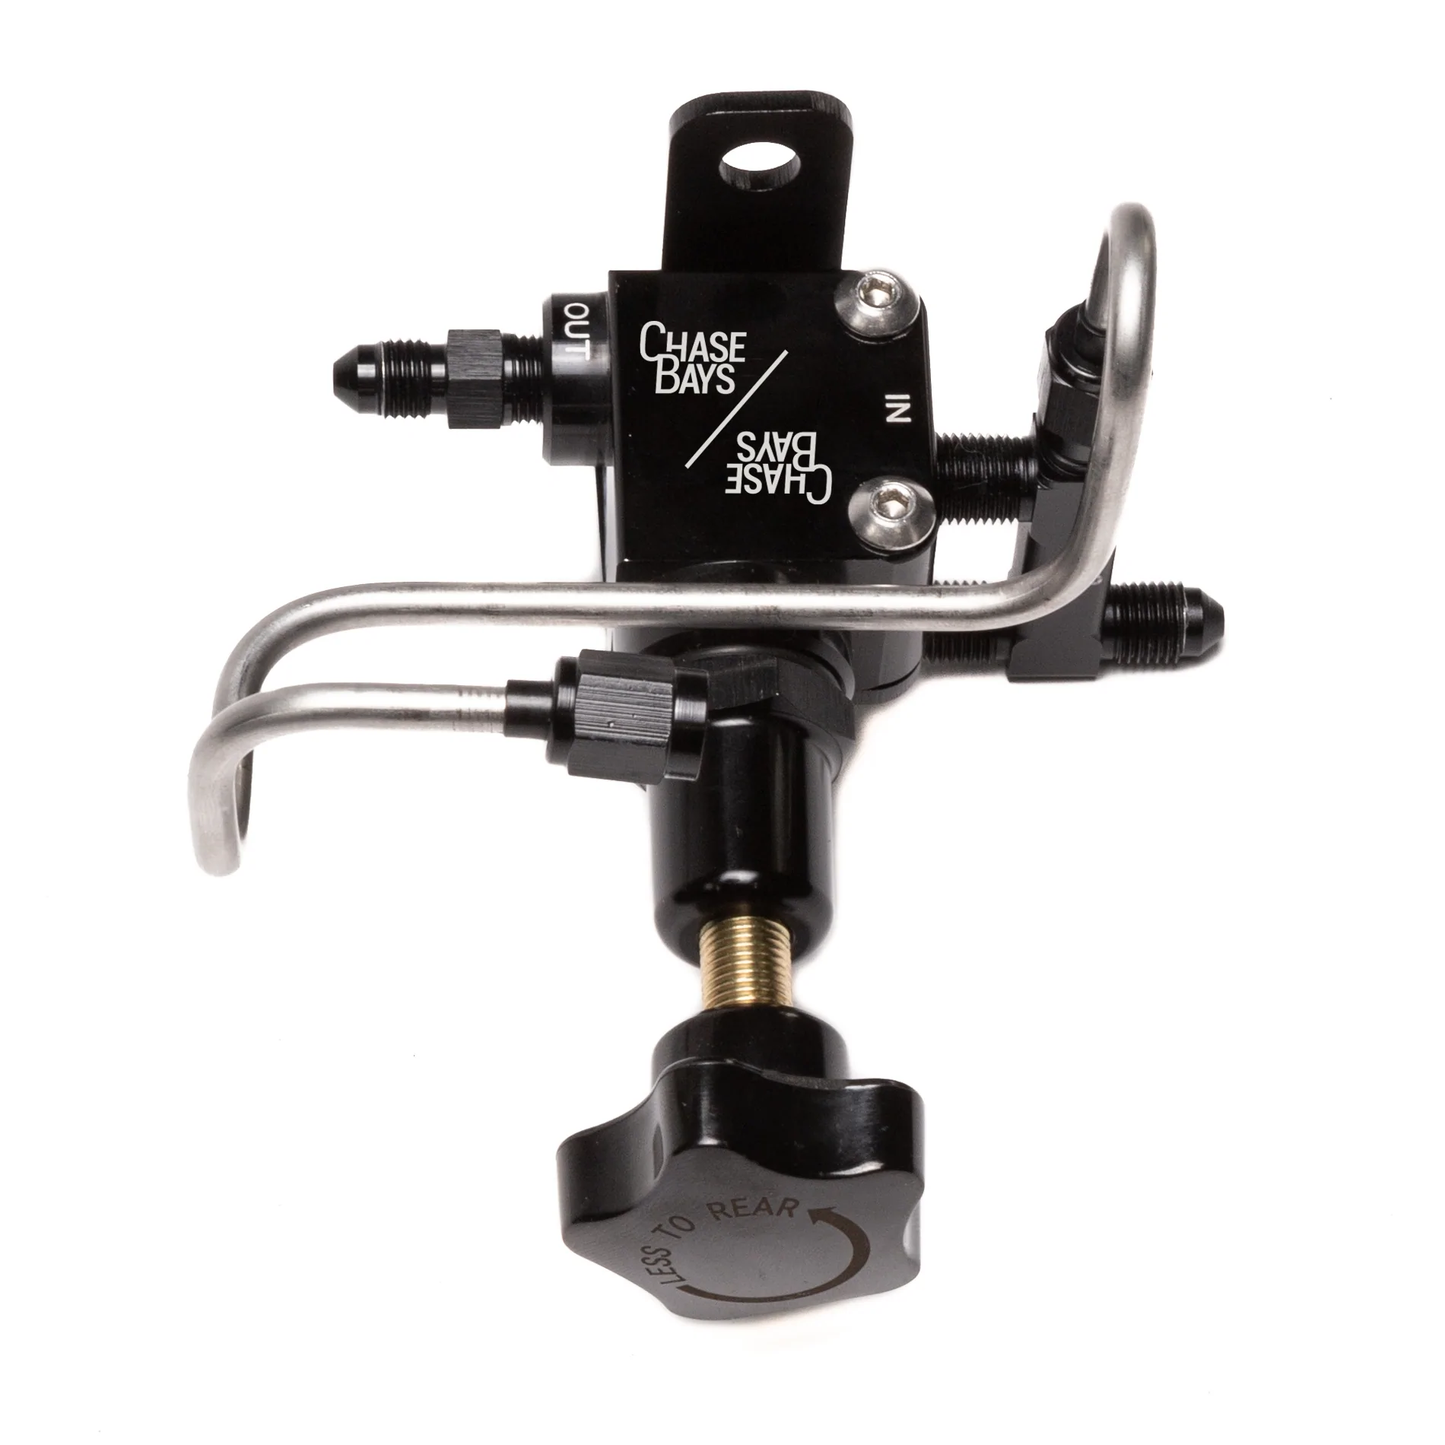
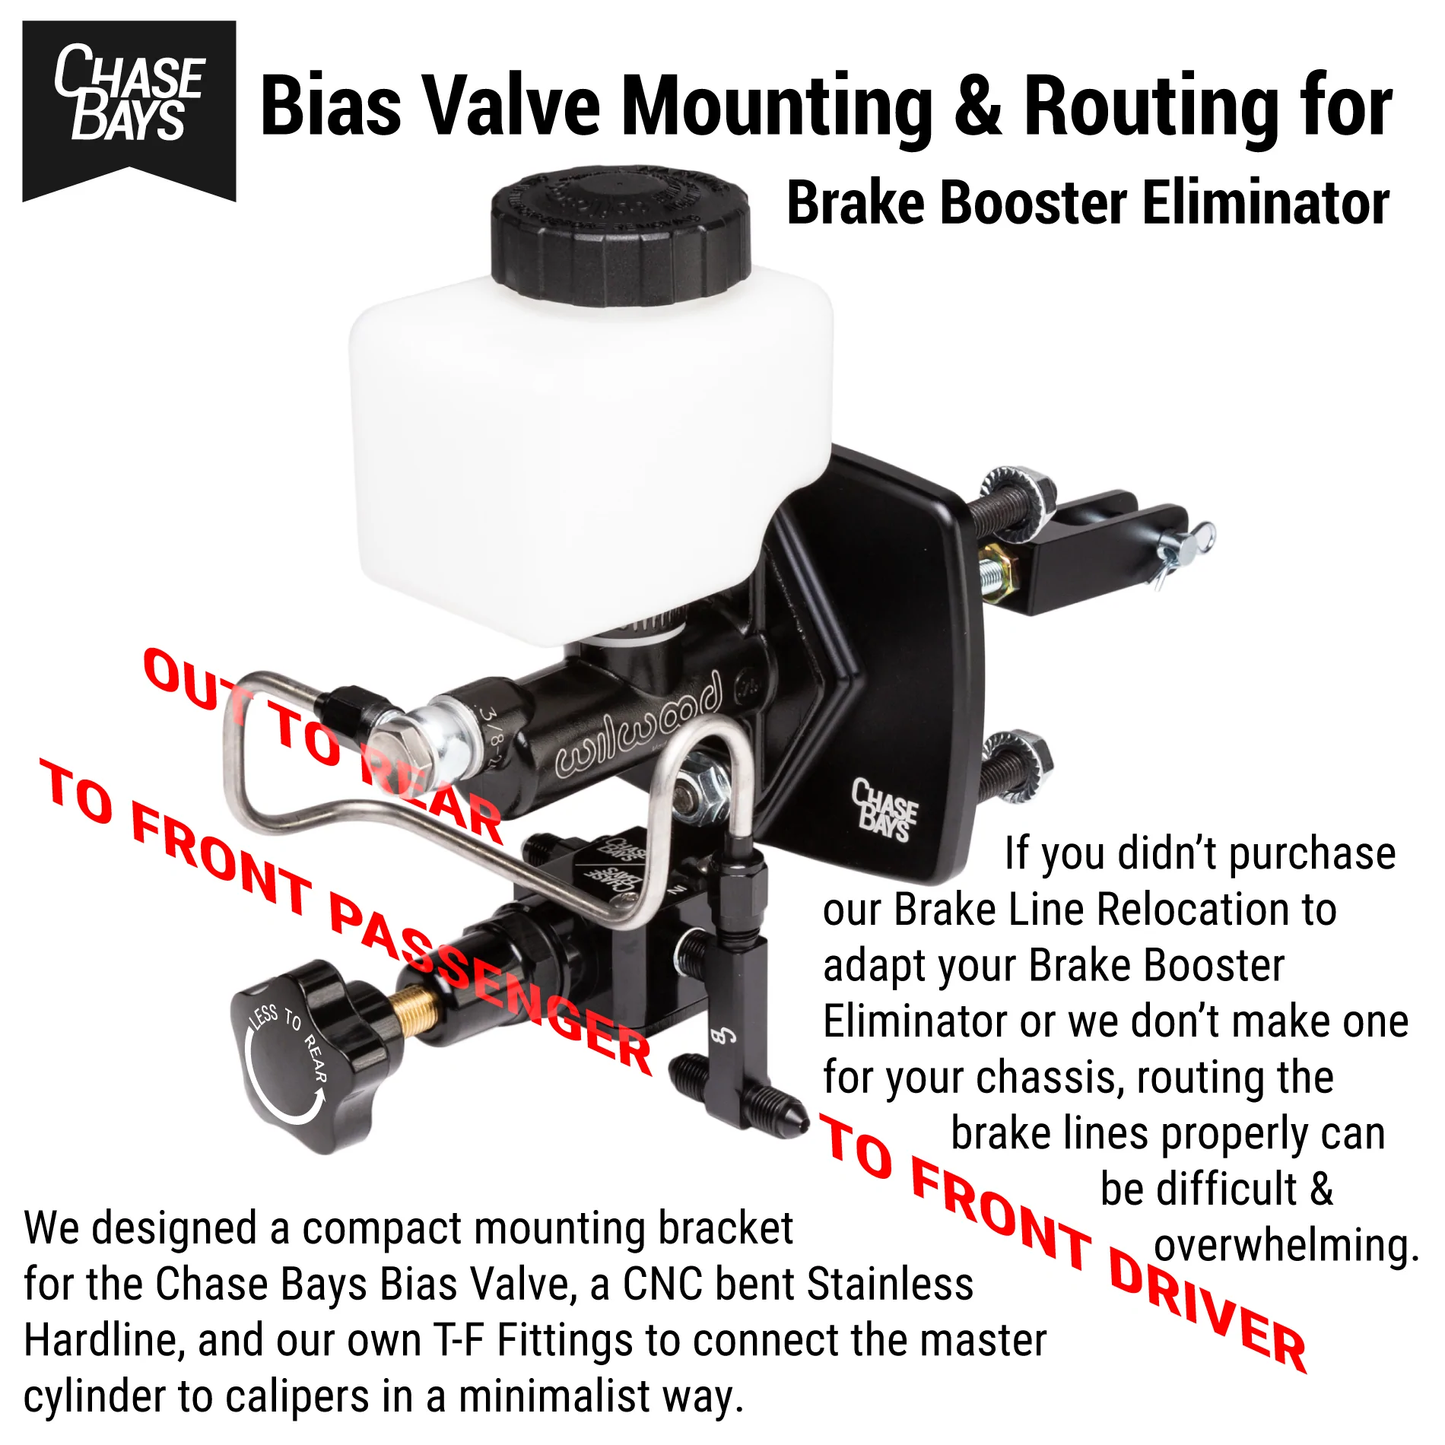
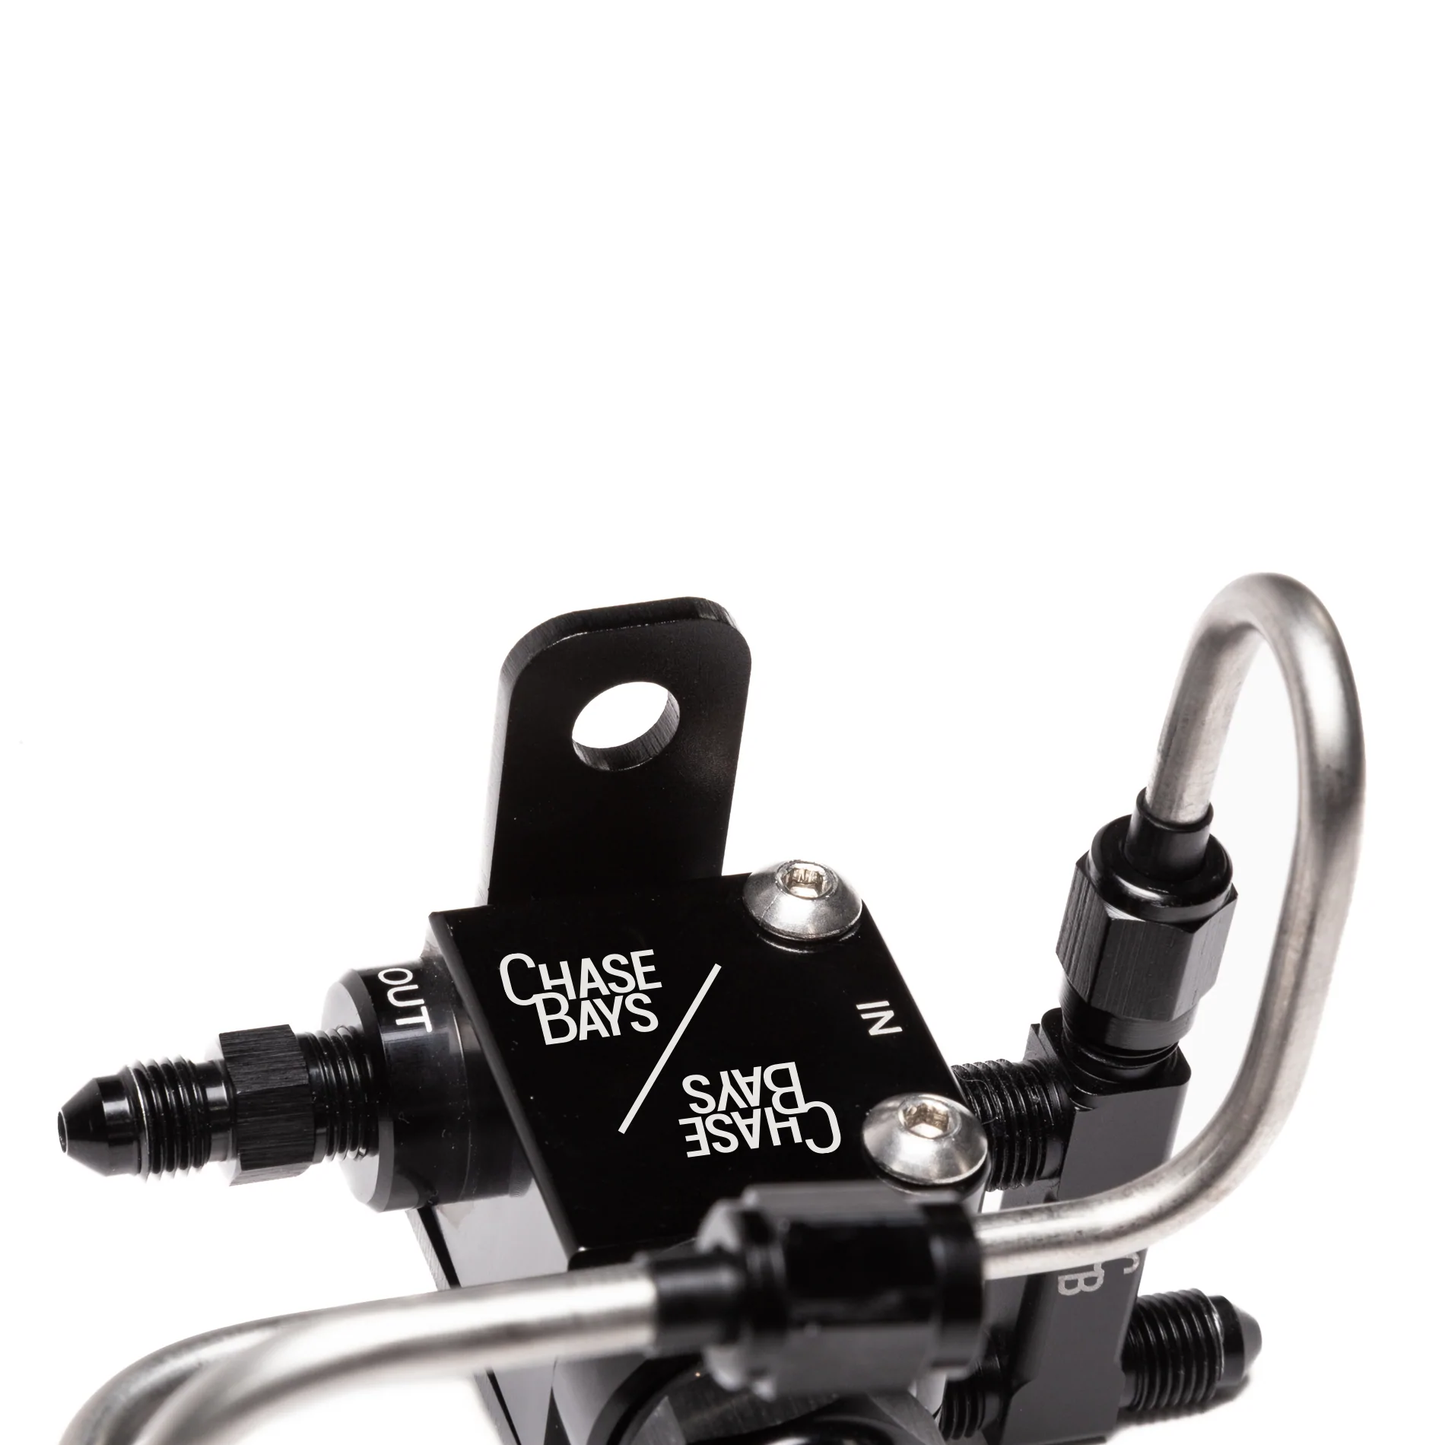
It was designed for the chassis we don't make a Brake Line Relocation for to assist in simplifying the universal installation. This kit includes the Chase Bays Brake Bias Valve, our compact designed mounting bracket for the Bias Valve with attachment hardware, a perfectly CNC bent stainless hardline, paired (2) Tee fittings together to make connecting the master cylinder to front calipers much easier, and the rear outlet fitting for connecting to the OE rear hard line or running new lines to the back. This works with all versions of our Brake Booster Eliminator. On that note, THE BRAKE BOOSTER ELIMINATOR IS A SEPARATE PURCHASE
Hose Routing
One hose to the front driver side caliper, one hose to the passenger side caliper, and one hose to the rear hard line(s). The front hoses will just need a metric to AN fitting to adapt the fender-well hose to our AN hose. A link to these is below. For the rear adaptation, there are some variables. Some chassis have 1 hard line from front to rear, and it tee’s off to 2 in the rear of the chassis. Other chassis have 2 hard lines from front to rear, each one going directly to their caliper destination. We’ve got a few clever ways to adapt the different types. Sometimes it's easy and sometimes it’s a little more challenging. If you’ve got it figured it, cool! If not, we want to help you through this process.
The next step is find or take a good photograph of where the rear lines adapt to the front. Its usually got some sort of male tube nut that attaches to splitter or tee, or directly to the ABS. Common locations are lower on the firewall near the frame rails and it varies from driver or passenger side. Our email is Sales@ChaseBays.com and remember, clear photos…not tiny blurry pixelated ones.
Dialing In the Bias Valve
• With the knob threaded all the way in/down, it gives 90% of the total braking pressure to rear. (10% reduction)
• With the knob threaded all the way out/up, it gives 40% of the total braking pressure to rear. (60% reduction)
These adjustments allows you to fine tune the front to rear braking balance by proportionately decreasing the rear (or in some cases the front) brake line pressure. If the range of adjustment in the valve is not sufficient to properly balance the vehicle’s bias, changes to other components within the system may be necessary. This product in most cases requires custom brake lines.
There isn't a specific setting per car, different front and rear weights for each setup change everything in terms of braking balance. We recommend starting with the knob turned all the way out/up which gives the least amount of pressure to the rear. Then turn the knob all the way in/down. This will give you both extremes and will give better insight into which direction you need to go.
Recently Viewed
Check out our Universal Parts Picker and explore even more of your favorite products—all in one place.
Same Day Fulfilment On in Stock Items!
2PM EST cutoff*
RETURNS
30 days return policy
Check our store for latest items
New products updated daily!
Mon - Fri Customer service
10am - 5pm